目次
前のトピックへ
次のトピックへ
このページ
Volt: テンプレートエンジン
Volt は、PHPのためにCで記述されており、とても速く、デザイナにも扱いやすいテンプレート言語です。簡単にビューを書けるようにヘルパーセットを提供します。Volt は、Phalcon の他のコンポーネントに高度に統合されており、また、あなたのアプリケーションの中でスタンドアロンのコンポーネントとしても利用できます。
Volt は、 Armin Ronacher. によって作られた Jinja にインスパイアされています。そのため、よく似た既存のテンプレートエンジンと同じ記法を採用しており、それらを使うたくさんの開発者が親しみやすくなっています。Voltの記法と機能は、Phalconを使う開発者が慣れ親しんだ、より多くの要素、もちろんパフォーマンスの点においても強化されています。
はじめに
Voltによるビューは純粋なPHPコードにコンパイルされるので、基本的には、手でPHPコードを書く労力を節約することができます:
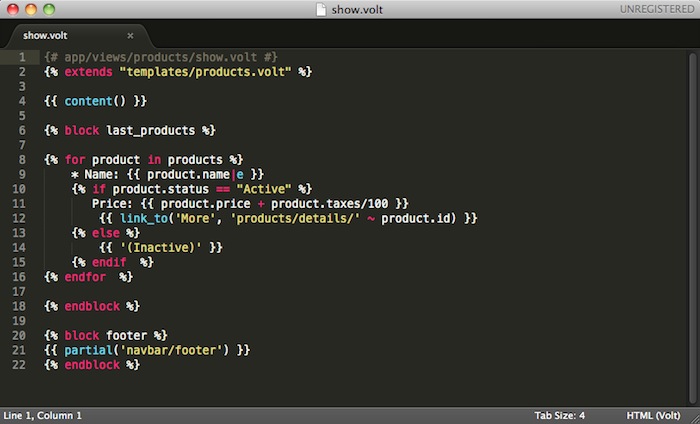
{# app/views/products/show.volt #}

{% block last_products %}

{% for product in products %}
    * Name: {{ product.name|e }}
    {% if product.status === "Active" %}
       Price: {{ product.price + product.taxes/100 }}
    {% endif  %}
{% endfor  %}

{% endblock %}
Voltの有効化
他のテンプレートエンジンと同じように、新しい拡張子や標準的な .phtml の拡張子を用いて、Volt をビューコンポーネントに登録することもできます:
<?php

use Phalcon\Mvc\View;
use Phalcon\Mvc\View\Engine\Volt;

// Register Volt as a service
$di->set(
    "voltService",
    function ($view, $di) {
        $volt = new Volt($view, $di);

        $volt->setOptions(
            [
                "compiledPath"      => "../app/compiled-templates/",
                "compiledExtension" => ".compiled",
            ]
        );

        return $volt;
    }
);

// Voltをテンプレートエンジンとして登録する
$di->set(
    "view",
    function () {
        $view = new View();

        $view->setViewsDir("../app/views/");

        $view->registerEngines(
            [
                ".volt" => "voltService",
            ]
        );

        return $view;
    }
);
標準的な ”.phtml” という拡張子を用いる:
<?php

$view->registerEngines(
    [
        ".phtml" => "voltService",
    ]
);
You don’t have to specify the Volt Service in the DI; you can also use the Volt engine with the default settings:
<?php

$view->registerEngines(
    [
        ".volt" => "Phalcon\\Mvc\\View\\Engine\\Volt",
    ]
);
If you do not want to reuse Volt as a service, you can pass an anonymous function to register the engine instead of a service name:
<?php

use Phalcon\Mvc\View;
use Phalcon\Mvc\View\Engine\Volt;

// Register Volt as template engine with an anonymous function
$di->set(
    "view",
    function () {
        $view = new \Phalcon\Mvc\View();

        $view->setViewsDir("../app/views/");

        $view->registerEngines(
            [
                ".volt" => function ($view, $di) {
                    $volt = new Volt($view, $di);

                    // Set some options here

                    return $volt;
                }
            ]
        );

        return $view;
    }
);
The following options are available in Volt:
| Option | Description | Default |
|---|---|---|
compiledPath |
A writable path where the compiled PHP templates will be placed | ./ |
compiledExtension |
An additional extension appended to the compiled PHP file | .php |
compiledSeparator |
Volt replaces the directory separators / and \ by this separator in order to create a single file in the compiled directory | %% |
stat |
Whether Phalcon must check if exists differences between the template file and its compiled path | true |
compileAlways |
Tell Volt if the templates must be compiled in each request or only when they change | false |
prefix |
Allows to prepend a prefix to the templates in the compilation path | null |
autoescape |
Enables globally autoescape of HTML | false |
The compilation path is generated according to the above options, if the developer wants total freedom defining the compilation path, an anonymous function can be used to generate it, this function receives the relative path to the template in the views directory. The following examples show how to change the compilation path dynamically:
<?php

// Just append the .php extension to the template path
// leaving the compiled templates in the same directory
$volt->setOptions(
    [
        "compiledPath" => function ($templatePath) {
            return $templatePath . ".php";
        }
    ]
);

// Recursively create the same structure in another directory
$volt->setOptions(
    [
        "compiledPath" => function ($templatePath) {
            $dirName = dirname($templatePath);

            if (!is_dir("cache/" . $dirName)) {
                mkdir("cache/" . $dirName);
            }

            return "cache/" . $dirName . "/". $templatePath . ".php";
        }
    ]
);
基本的な使い方
ビューは、VoltやPHP、HTMLのコードで構成されます。Voltモードでは、特有のデリミタのセットが使用できます。 {% ... %} は、forループや値の代入など、制御文を実行する場合に使います。また、 {{ ... }} は、テンプレートに記述した結果を出力します。
下記は、いくつかの基本を示す最小限のテンプレートです:
{# app/views/posts/show.phtml #}
<!DOCTYPE html>
<html>
    <head>
        <title>{{ title }} - An example blog</title>
    </head>
    <body>

        {% if show_navigation %}
            <ul id="navigation">
                {% for item in menu %}
                    <li>
                        <a href="{{ item.href }}">
                            {{ item.caption }}
                        </a>
                    </li>
                {% endfor %}
            </ul>
        {% endif %}

        <h1>{{ post.title }}</h1>

        <div class="content">
            {{ post.content }}
        </div>

    </body>
</html>
Phalcon\Mvc\View を使うことで、コントローラからビューへ変数を渡すことができます。上記の例では、show_navigation、menu、title、post の4つの変数がビューへ渡されています:
<?php

use Phalcon\Mvc\Controller;

class PostsController extends Controller
{
    public function showAction()
    {
        $post = Post::findFirst();
        $menu = Menu::findFirst();

        $this->view->show_navigation = true;
        $this->view->menu            = $menu;
        $this->view->title           = $post->title;
        $this->view->post            = $post;

        // Or...

        $this->view->setVar("show_navigation", true);
        $this->view->setVar("menu",            $menu);
        $this->view->setVar("title",           $post->title);
        $this->view->setVar("post",            $post);
    }
}
変数
オブジェクト変数は、foo.bar というシンタックスを用いてアクセスできる属性を持っています。もし配列を渡すなら、foo['bar'] という角括弧のシンタックスを使ってください。
{{ post.title }} {# for $post->title #}
{{ post['title'] }} {# for $post['title'] #}
フィルタ
変数は、フォーマットしたり、フィルタを用いて加工することができます。変数にフィルタを適用するには、パイプ演算子 | を使います:
{{ post.title|e }}
{{ post.content|striptags }}
{{ name|capitalize|trim }}
以下は、Voltで利用可能な、ビルトインのフィルタのリストです:
| Filter | Description |
|---|---|
e |
Applies Phalcon\Escaper->escapeHtml() to the value |
escape |
Applies Phalcon\Escaper->escapeHtml() to the value |
escape_css |
Applies Phalcon\Escaper->escapeCss() to the value |
escape_js |
Applies Phalcon\Escaper->escapeJs() to the value |
escape_attr |
Applies Phalcon\Escaper->escapeHtmlAttr() to the value |
trim |
Applies the trim PHP function to the value. Removing extra spaces |
left_trim |
Applies the ltrim PHP function to the value. Removing extra spaces |
right_trim |
Applies the rtrim PHP function to the value. Removing extra spaces |
striptags |
Applies the striptags PHP function to the value. Removing HTML tags |
slashes |
Applies the slashes PHP function to the value. Escaping values |
stripslashes |
Applies the stripslashes PHP function to the value. Removing escaped quotes |
capitalize |
Capitalizes a string by applying the ucwords PHP function to the value |
lower |
Change the case of a string to lowercase |
upper |
Change the case of a string to uppercase |
length |
Counts the string length or how many items are in an array or object |
nl2br |
Changes newlines \n by line breaks (<br />). Uses the PHP function nl2br |
sort |
Sorts an array using the PHP function asort |
keys |
Returns the array keys using array_keys |
join |
Joins the array parts using a separator join |
format |
Formats a string using sprintf. |
json_encode |
Converts a value into its JSON representation |
json_decode |
Converts a value from its JSON representation to a PHP representation |
abs |
Applies the abs PHP function to a value. |
url_encode |
Applies the urlencode PHP function to the value |
default |
Sets a default value in case that the evaluated expression is empty (is not set or evaluates to a falsy value) |
convert_encoding |
Converts a string from one charset to another |
例:
{# e or escape filter #}
{{ "<h1>Hello<h1>"|e }}
{{ "<h1>Hello<h1>"|escape }}

{# trim filter #}
{{ "   hello   "|trim }}

{# striptags filter #}
{{ "<h1>Hello<h1>"|striptags }}

{# slashes filter #}
{{ "'this is a string'"|slashes }}

{# stripslashes filter #}
{{ "\'this is a string\'"|stripslashes }}

{# capitalize filter #}
{{ "hello"|capitalize }}

{# lower filter #}
{{ "HELLO"|lower }}

{# upper filter #}
{{ "hello"|upper }}

{# length filter #}
{{ "robots"|length }}
{{ [1, 2, 3]|length }}

{# nl2br filter #}
{{ "some\ntext"|nl2br }}

{# sort filter #}
{% set sorted = [3, 1, 2]|sort %}

{# keys filter #}
{% set keys = ['first': 1, 'second': 2, 'third': 3]|keys %}

{# join filter #}
{% set joined = "a".."z"|join(",") %}

{# format filter #}
{{ "My real name is %s"|format(name) }}

{# json_encode filter #}
{% set encoded = robots|json_encode %}

{# json_decode filter #}
{% set decoded = '{"one":1,"two":2,"three":3}'|json_decode %}

{# url_encode filter #}
{{ post.permanent_link|url_encode }}

{# convert_encoding filter #}
{{ "désolé"|convert_encoding('utf8', 'latin1') }}
コメント
コメントも、{# ... #} というデリミタを用いることで、テンプレートに含めることができます。このデリミタの内側にあるテキストはすべて、最終的な出力の際に無視されます:
{# note: this is a comment
    {% set price = 100; %}
#}
制御構文
Voltは、テンプレートの中で使うための、基本的だがパワフルな制御構文のセットを提供しています:
for文 ^^^ シーケンス中のそれぞれのアイテムを繰り返し処理します。以下の例では、「robots」のセットを横断して処理し、彼/彼女らの名前を表示する方法を示しています:
<h1>Robots</h1>
<ul>
    {% for robot in robots %}
        <li>
            {{ robot.name|e }}
        </li>
    {% endfor %}
</ul>
forループは入れ子にすることもできます:
<h1>Robots</h1>
{% for robot in robots %}
    {% for part in robot.parts %}
        Robot: {{ robot.name|e }} Part: {{ part.name|e }} <br />
    {% endfor %}
{% endfor %}
以下のシンタックスを用いることで、PHPにおける要素のキーを得ることができます:
{% set numbers = ['one': 1, 'two': 2, 'three': 3] %}

{% for name, value in numbers %}
    Name: {{ name }} Value: {{ value }}
{% endfor %}
必要に応じて「if」の評価を設定することができます:
{% set numbers = ['one': 1, 'two': 2, 'three': 3] %}

{% for value in numbers if value < 2 %}
    Value: {{ value }}
{% endfor %}

{% for name, value in numbers if name !== 'two' %}
    Name: {{ name }} Value: {{ value }}
{% endfor %}
もし、「for」の中で 「else」を定義した場合は、イテレータの結果が 0回のときに、そこに記述した文が実行されるでしょう:
<h1>Robots</h1>
{% for robot in robots %}
    Robot: {{ robot.name|e }} Part: {{ part.name|e }} <br />
{% else %}
    There are no robots to show
{% endfor %}
代替えシンタックス:
<h1>Robots</h1>
{% for robot in robots %}
    Robot: {{ robot.name|e }} Part: {{ part.name|e }} <br />
{% elsefor %}
    There are no robots to show
{% endfor %}
ループの制御
「break」と「continue」文は、ループから抜けたり、現在のブロック内で強制的に次のイテレーションへ移ったりすることができます:
{# skip the even robots #}
{% for index, robot in robots %}
    {% if index is even %}
        {% continue %}
    {% endif %}
    ...
{% endfor %}
{# exit the foreach on the first even robot #}
{% for index, robot in robots %}
    {% if index is even %}
        {% break %}
    {% endif %}
    ...
{% endfor %}
IF文 ^^ PHPと同じように、「if」文は、条件式が true または false に評価されるかをチェックします:
<h1>Cyborg Robots</h1>
<ul>
    {% for robot in robots %}
        {% if robot.type === "cyborg" %}
            <li>{{ robot.name|e }}</li>
        {% endif %}
    {% endfor %}
</ul>
else 文もサポートされています:
<h1>Robots</h1>
<ul>
    {% for robot in robots %}
        {% if robot.type === "cyborg" %}
            <li>{{ robot.name|e }}</li>
        {% else %}
            <li>{{ robot.name|e }} (not a cyborg)</li>
        {% endif %}
    {% endfor %}
</ul>
The ‘elseif’ control flow structure can be used together with if to emulate a ‘switch’ block:
{% if robot.type === "cyborg" %}
    Robot is a cyborg
{% elseif robot.type === "virtual" %}
    Robot is virtual
{% elseif robot.type === "mechanical" %}
    Robot is mechanical
{% endif %}
ループ・コンテキスト
A special variable is available inside ‘for’ loops providing you information about
| Variable | Description |
|---|---|
loop.index |
The current iteration of the loop. (1 indexed) |
loop.index0 |
The current iteration of the loop. (0 indexed) |
loop.revindex |
The number of iterations from the end of the loop (1 indexed) |
loop.revindex0 |
The number of iterations from the end of the loop (0 indexed) |
loop.first |
True if in the first iteration. |
loop.last |
True if in the last iteration. |
loop.length |
The number of items to iterate |
{% for robot in robots %}
    {% if loop.first %}
        <table>
            <tr>
                <th>#</th>
                <th>Id</th>
                <th>Name</th>
            </tr>
    {% endif %}
            <tr>
                <td>{{ loop.index }}</td>
                <td>{{ robot.id }}</td>
                <td>{{ robot.name }}</td>
            </tr>
    {% if loop.last %}
        </table>
    {% endif %}
{% endfor %}
変数の割り当て
Variables may be changed in a template using the instruction “set”:
{% set fruits = ['Apple', 'Banana', 'Orange'] %}

{% set name = robot.name %}
Multiple assignments are allowed in the same instruction:
{% set fruits = ['Apple', 'Banana', 'Orange'], name = robot.name, active = true %}
Additionally, you can use compound assignment operators:
{% set price += 100.00 %}

{% set age *= 5 %}
The following operators are available:
| Operator | Description |
|---|---|
| = | Standard Assignment |
| += | Addition assignment |
| -= | Subtraction assignment |
| *= | Multiplication assignment |
| /= | Division assignment |
式
Volt provides a basic set of expression support, including literals and common operators.
A expression can be evaluated and printed using the ‘{{‘ and ‘}}’ delimiters:
{{ (1 + 1) * 2 }}
If an expression needs to be evaluated without be printed the ‘do’ statement can be used:
{% do (1 + 1) * 2 %}
リテラル
The following literals are supported:
| Filter | Description |
|---|---|
| “this is a string” | Text between double quotes or single quotes are handled as strings |
| 100.25 | Numbers with a decimal part are handled as doubles/floats |
| 100 | Numbers without a decimal part are handled as integers |
| false | Constant “false” is the boolean false value |
| true | Constant “true” is the boolean true value |
| null | Constant “null” is the Null value |
配列
Whether you’re using PHP 5.3 or >= 5.4 you can create arrays by enclosing a list of values in square brackets:
{# Simple array #}
{{ ['Apple', 'Banana', 'Orange'] }}

{# Other simple array #}
{{ ['Apple', 1, 2.5, false, null] }}

{# Multi-Dimensional array #}
{{ [[1, 2], [3, 4], [5, 6]] }}

{# Hash-style array #}
{{ ['first': 1, 'second': 4/2, 'third': '3'] }}
Curly braces also can be used to define arrays or hashes:
{% set myArray = {'Apple', 'Banana', 'Orange'} %}
{% set myHash  = {'first': 1, 'second': 4/2, 'third': '3'} %}
演算子
You may make calculations in templates using the following operators:
| Operator | Description |
|---|---|
+ |
Perform an adding operation. {{ 2 + 3 }} returns 5 |
- |
Perform a substraction operation {{ 2 - 3 }} returns -1 |
* |
Perform a multiplication operation {{ 2 * 3 }} returns 6 |
/ |
Perform a division operation {{ 10 / 2 }} returns 5 |
% |
Calculate the remainder of an integer division {{ 10 % 3 }} returns 1 |
比較演算子
The following comparison operators are available:
| Operator | Description |
|---|---|
== |
Check whether both operands are equal |
!= |
Check whether both operands aren’t equal |
<> |
Check whether both operands aren’t equal |
> |
Check whether left operand is greater than right operand |
< |
Check whether left operand is less than right operand |
<= |
Check whether left operand is less or equal than right operand |
>= |
Check whether left operand is greater or equal than right operand |
=== |
Check whether both operands are identical |
!== |
Check whether both operands aren’t identical |
論理演算子
Logic operators are useful in the “if” expression evaluation to combine multiple tests:
| Operator | Description |
|---|---|
or |
Return true if the left or right operand is evaluated as true |
and |
Return true if both left and right operands are evaluated as true |
not |
Negates an expression |
( expr ) |
Parenthesis groups expressions |
その他の演算子
Additional operators seen the following operators are available:
| Operator | Description |
|---|---|
~ |
Concatenates both operands {{ "hello " ~ "world" }} |
| |
Applies a filter in the right operand to the left {{ "hello"|uppercase }} |
.. |
Creates a range {{ 'a'..'z' }} {{ 1..10 }} |
is |
Same as == (equals), also performs tests |
in |
To check if an expression is contained into other expressions if "a" in "abc" |
is not |
Same as != (not equals) |
'a' ? 'b' : 'c' |
Ternary operator. The same as the PHP ternary operator |
++ |
Increments a value |
-- |
Decrements a value |
The following example shows how to use operators:
{% set robots = ['Voltron', 'Astro Boy', 'Terminator', 'C3PO'] %}

{% for index in 0..robots|length %}
    {% if robots[index] is defined %}
        {{ "Name: " ~ robots[index] }}
    {% endif %}
{% endfor %}
テスト
Tests can be used to test if a variable has a valid expected value. The operator “is” is used to perform the tests:
{% set robots = ['1': 'Voltron', '2': 'Astro Boy', '3': 'Terminator', '4': 'C3PO'] %}

{% for position, name in robots %}
    {% if position is odd %}
        {{ name }}
    {% endif %}
{% endfor %}
The following built-in tests are available in Volt:
| Test | Description |
|---|---|
defined |
Checks if a variable is defined (isset()) |
empty |
Checks if a variable is empty |
even |
Checks if a numeric value is even |
odd |
Checks if a numeric value is odd |
numeric |
Checks if value is numeric |
scalar |
Checks if value is scalar (not an array or object) |
iterable |
Checks if a value is iterable. Can be traversed by a “for” statement |
divisibleby |
Checks if a value is divisible by other value |
sameas |
Checks if a value is identical to other value |
type |
Checks if a value is of the specified type |
More examples:
{% if robot is defined %}
    The robot variable is defined
{% endif %}

{% if robot is empty %}
    The robot is null or isn't defined
{% endif %}

{% for key, name in [1: 'Voltron', 2: 'Astroy Boy', 3: 'Bender'] %}
    {% if key is even %}
        {{ name }}
    {% endif %}
{% endfor %}

{% for key, name in [1: 'Voltron', 2: 'Astroy Boy', 3: 'Bender'] %}
    {% if key is odd %}
        {{ name }}
    {% endif %}
{% endfor %}

{% for key, name in [1: 'Voltron', 2: 'Astroy Boy', 'third': 'Bender'] %}
    {% if key is numeric %}
        {{ name }}
    {% endif %}
{% endfor %}

{% set robots = [1: 'Voltron', 2: 'Astroy Boy'] %}
{% if robots is iterable %}
    {% for robot in robots %}
        ...
    {% endfor %}
{% endif %}

{% set world = "hello" %}
{% if world is sameas("hello") %}
    {{ "it's hello" }}
{% endif %}

{% set external = false %}
{% if external is type('boolean') %}
    {{ "external is false or true" }}
{% endif %}
マクロ
Macros can be used to reuse logic in a template, they act as PHP functions, can receive parameters and return values:
{# Macro "display a list of links to related topics" #}
{%- macro related_bar(related_links) %}
    <ul>
        {%- for link in related_links %}
            <li>
                <a href="{{ url(link.url) }}" title="{{ link.title|striptags }}">
                    {{ link.text }}
                </a>
            </li>
        {%- endfor %}
    </ul>
{%- endmacro %}

{# Print related links #}
{{ related_bar(links) }}

<div>This is the content</div>

{# Print related links again #}
{{ related_bar(links) }}
When calling macros, parameters can be passed by name:
{%- macro error_messages(message, field, type) %}
    <div>
        <span class="error-type">{{ type }}</span>
        <span class="error-field">{{ field }}</span>
        <span class="error-message">{{ message }}</span>
    </div>
{%- endmacro %}

{# Call the macro #}
{{ error_messages('type': 'Invalid', 'message': 'The name is invalid', 'field': 'name') }}
Macros can return values:
{%- macro my_input(name, class) %}
    {% return text_field(name, 'class': class) %}
{%- endmacro %}

{# Call the macro #}
{{ '<p>' ~ my_input('name', 'input-text') ~ '</p>' }}
And receive optional parameters:
{%- macro my_input(name, class="input-text") %}
    {% return text_field(name, 'class': class) %}
{%- endmacro %}

{# Call the macro #}
{{ '<p>' ~ my_input('name') ~ '</p>' }}
{{ '<p>' ~ my_input('name', 'input-text') ~ '</p>' }}
タグヘルパの使用
Volt is highly integrated with Phalcon\Tag, so it’s easy to use the helpers provided by that component in a Volt template:
{{ javascript_include("js/jquery.js") }}

{{ form('products/save', 'method': 'post') }}

    <label for="name">Name</label>
    {{ text_field("name", "size": 32) }}

    <label for="type">Type</label>
    {{ select("type", productTypes, 'using': ['id', 'name']) }}

    {{ submit_button('Send') }}

{{ end_form() }}
The following PHP is generated:
<?php echo Phalcon\Tag::javascriptInclude("js/jquery.js") ?>

<?php echo Phalcon\Tag::form(array('products/save', 'method' => 'post')); ?>

    <label for="name">Name</label>
    <?php echo Phalcon\Tag::textField(array('name', 'size' => 32)); ?>

    <label for="type">Type</label>
    <?php echo Phalcon\Tag::select(array('type', $productTypes, 'using' => array('id', 'name'))); ?>

    <?php echo Phalcon\Tag::submitButton('Send'); ?>

{{ end_form() }}
To call a Phalcon\Tag helper, you only need to call an uncamelized version of the method:
| Method | Volt function |
|---|---|
Phalcon\Tag::linkTo |
link_to |
Phalcon\Tag::textField |
text_field |
Phalcon\Tag::passwordField |
password_field |
Phalcon\Tag::hiddenField |
hidden_field |
Phalcon\Tag::fileField |
file_field |
Phalcon\Tag::checkField |
check_field |
Phalcon\Tag::radioField |
radio_field |
Phalcon\Tag::dateField |
date_field |
Phalcon\Tag::emailField |
email_field |
Phalcon\Tag::numericField |
numeric_field |
Phalcon\Tag::submitButton |
submit_button |
Phalcon\Tag::selectStatic |
select_static |
Phalcon\Tag::select |
select |
Phalcon\Tag::textArea |
text_area |
Phalcon\Tag::form |
form |
Phalcon\Tag::endForm |
end_form |
Phalcon\Tag::getTitle |
get_title |
Phalcon\Tag::stylesheetLink |
stylesheet_link |
Phalcon\Tag::javascriptInclude |
javascript_include |
Phalcon\Tag::image |
image |
Phalcon\Tag::friendlyTitle |
friendly_title |
ビルトイン関数
The following built-in functions are available in Volt:
| Name | Description |
|---|---|
content |
Includes the content produced in a previous rendering stage |
get_content |
Same as content |
partial |
Dynamically loads a partial view in the current template |
super |
Render the contents of the parent block |
time |
Calls the PHP function with the same name |
date |
Calls the PHP function with the same name |
dump |
Calls the PHP function var_dump() |
version |
Returns the current version of the framework |
constant |
Reads a PHP constant |
url |
Generate a URL using the ‘url’ service |
Viewの統合
Also, Volt is integrated with Phalcon\Mvc\View, you can play with the view hierarchy and include partials as well:
{{ content() }}

<!-- Simple include of a partial -->
<div id="footer">{{ partial("partials/footer") }}</div>

<!-- Passing extra variables -->
<div id="footer">{{ partial("partials/footer", ['links': links]) }}</div>
A partial is included in runtime, Volt also provides “include”, this compiles the content of a view and returns its contents as part of the view which was included:
{# Simple include of a partial #}
<div id="footer">
    {% include "partials/footer" %}
</div>

{# Passing extra variables #}
<div id="footer">
    {% include "partials/footer" with ['links': links] %}
</div>
インクルード
‘include’ has a special behavior that will help us improve performance a bit when using Volt, if you specify the extension when including the file and it exists when the template is compiled, Volt can inline the contents of the template in the parent template where it’s included. Templates aren’t inlined if the ‘include’ have variables passed with ‘with’:
{# The contents of 'partials/footer.volt' is compiled and inlined #}
<div id="footer">
    {% include "partials/footer.volt" %}
</div>
Partial vs Include
Keep the following points in mind when choosing to use the “partial” function or “include”:
- ‘Partial’ allows you to include templates made in Volt and in other template engines as well
- ‘Partial’ allows you to pass an expression like a variable allowing to include the content of other view dynamically
- ‘Partial’ is better if the content that you have to include changes frequently
- ‘Include’ copies the compiled content into the view which improves the performance
- ‘Include’ only allows to include templates made with Volt
- ‘Include’ requires an existing template at compile time
テンプレートの継承
With template inheritance you can create base templates that can be extended by others templates allowing to reuse code. A base template define blocks than can be overridden by a child template. Let’s pretend that we have the following base template:
{# templates/base.volt #}
<!DOCTYPE html>
<html>
<head>
{% block head %}
<link rel="stylesheet" href="style.css" />
{% endblock %}
<title>{% block title %}{% endblock %} - My Webpage</title>
</head>
<body>
<div id="content">{% block content %}{% endblock %}</div>
<div id="footer">
{% block footer %}© Copyright 2015, All rights reserved.{% endblock %}
</div>
</body>
</html>
From other template we could extend the base template replacing the blocks:
{% extends "templates/base.volt" %}

{% block title %}Index{% endblock %}

{% block head %}<style type="text/css">.important { color: #336699; }</style>{% endblock %}

{% block content %}
    <h1>Index</h1>
    <p class="important">Welcome on my awesome homepage.</p>
{% endblock %}
Not all blocks must be replaced at a child template, only those that are needed. The final output produced will be the following:
<!DOCTYPE html>
<html>
<head>
<style type="text/css">.important { color: #336699; }</style>
<title>Index - My Webpage</title>
</head>
<body>
<div id="content">
<h1>Index</h1>
<p class="important">Welcome on my awesome homepage.</p>
</div>
<div id="footer">
© Copyright 2015, All rights reserved.
</div>
</body>
</html>
多重継承
Extended templates can extend other templates. The following example illustrates this:
{# main.volt #}
<!DOCTYPE html>
<html>
    <head>
        <title>Title</title>
    </head>

    <body>
        {% block content %}{% endblock %}
    </body>
</html>
Template “layout.volt” extends “main.volt”
{# layout.volt #}
{% extends "main.volt" %}

{% block content %}

    <h1>Table of contents</h1>

{% endblock %}
Finally a view that extends “layout.volt”:
{# index.volt #}
{% extends "layout.volt" %}

{% block content %}

    {{ super() }}

    <ul>
        <li>Some option</li>
        <li>Some other option</li>
    </ul>

{% endblock %}
Rendering “index.volt” produces:
<!DOCTYPE html>
<html>
    <head>
        <title>Title</title>
    </head>

    <body>

        <h1>Table of contents</h1>

        <ul>
            <li>Some option</li>
            <li>Some other option</li>
        </ul>

    </body>
</html>
Note the call to the function super(). With that function it’s possible to render the contents of the parent block.
As partials, the path set to “extends” is a relative path under the current views directory (i.e. app/views/).
By default, and for performance reasons, Volt only checks for changes in the children templates to know when to re-compile to plain PHP again, so it is recommended initialize Volt with the option'compileAlways' => true. Thus, the templates are compiled always taking into account changes in the parent templates.
自動エスケープモード
You can enable auto-escaping of all variables printed in a block using the autoescape mode:
Manually escaped: {{ robot.name|e }}

{% autoescape true %}
    Autoescaped: {{ robot.name }}
    {% autoescape false %}
        No Autoescaped: {{ robot.name }}
    {% endautoescape %}
{% endautoescape %}
Voltの拡張
Unlike other template engines, Volt itself is not required to run the compiled templates. Once the templates are compiled there is no dependence on Volt. With performance independence in mind, Volt only acts as a compiler for PHP templates.
The Volt compiler allow you to extend it adding more functions, tests or filters to the existing ones.
Functions
Functions act as normal PHP functions, a valid string name is required as function name. Functions can be added using two strategies, returning a simple string or using an anonymous function. Always is required that the chosen strategy returns a valid PHP string expression:
<?php

use Phalcon\Mvc\View\Engine\Volt;

$volt = new Volt($view, $di);

$compiler = $volt->getCompiler();

// This binds the function name 'shuffle' in Volt to the PHP function 'str_shuffle'
$compiler->addFunction("shuffle", "str_shuffle");
Register the function with an anonymous function. This case we use $resolvedArgs to pass the arguments exactly
as were passed in the arguments:
<?php

$compiler->addFunction(
    "widget",
    function ($resolvedArgs, $exprArgs) {
        return "MyLibrary\\Widgets::get(" . $resolvedArgs . ")";
    }
);
Treat the arguments independently and unresolved:
<?php

$compiler->addFunction(
    "repeat",
    function ($resolvedArgs, $exprArgs) use ($compiler) {
        // Resolve the first argument
        $firstArgument = $compiler->expression($exprArgs[0]['expr']);

        // Checks if the second argument was passed
        if (isset($exprArgs[1])) {
            $secondArgument = $compiler->expression($exprArgs[1]['expr']);
        } else {
            // Use '10' as default
            $secondArgument = '10';
        }

        return "str_repeat(" . $firstArgument . ", " . $secondArgument . ")";
    }
);
Generate the code based on some function availability:
<?php

$compiler->addFunction(
    "contains_text",
    function ($resolvedArgs, $exprArgs) {
        if (function_exists("mb_stripos")) {
            return "mb_stripos(" . $resolvedArgs . ")";
        } else {
            return "stripos(" . $resolvedArgs . ")";
        }
    }
);
Built-in functions can be overridden adding a function with its name:
<?php

// Replace built-in function dump
$compiler->addFunction("dump", "print_r");
フィルタ
A filter has the following form in a template: leftExpr|name(optional-args). Adding new filters is similar as seen with the functions:
<?php

// This creates a filter 'hash' that uses the PHP function 'md5'
$compiler->addFilter("hash", "md5");
<?php

$compiler->addFilter(
    "int",
    function ($resolvedArgs, $exprArgs) {
        return "intval(" . $resolvedArgs . ")";
    }
);
Built-in filters can be overridden adding a function with its name:
<?php

// Replace built-in filter 'capitalize'
$compiler->addFilter("capitalize", "lcfirst");
Extensions
With extensions the developer has more flexibility to extend the template engine, and override the compilation of a specific instruction, change the behavior of an expression or operator, add functions/filters, and more.
An extension is a class that implements the events triggered by Volt as a method of itself.
For example, the class below allows to use any PHP function in Volt:
<?php

class PhpFunctionExtension
{
    /**
     * This method is called on any attempt to compile a function call
     */
    public function compileFunction($name, $arguments)
    {
        if (function_exists($name)) {
            return $name . "(". $arguments . ")";
        }
    }
}
The above class implements the method ‘compileFunction’ which is invoked before any attempt to compile a function call in any template. The purpose of the extension is to verify if a function to be compiled is a PHP function allowing to call it from the template. Events in extensions must return valid PHP code, this will be used as result of the compilation instead of the one generated by Volt. If an event doesn’t return an string the compilation is done using the default behavior provided by the engine.
The following compilation events are available to be implemented in extensions:
| Event/Method | Description |
|---|---|
compileFunction |
Triggered before trying to compile any function call in a template |
compileFilter |
Triggered before trying to compile any filter call in a template |
resolveExpression |
Triggered before trying to compile any expression. This allows the developer to override operators |
compileStatement |
Triggered before trying to compile any expression. This allows the developer to override any statement |
Volt extensions must be in registered in the compiler making them available in compile time:
<?php

// Register the extension in the compiler
$compiler->addExtension(
    new PhpFunctionExtension()
);
View部品のキャッシュ
With Volt it’s easy cache view fragments. This caching improves performance preventing that the contents of a block from being executed by PHP each time the view is displayed:
{% cache "sidebar" %}
    <!-- generate this content is slow so we are going to cache it -->
{% endcache %}
Setting a specific number of seconds:
{# cache the sidebar by 1 hour #}
{% cache "sidebar" 3600 %}
    <!-- generate this content is slow so we are going to cache it -->
{% endcache %}
Any valid expression can be used as cache key:
{% cache ("article-" ~ post.id) 3600 %}

    <h1>{{ post.title }}</h1>

    <p>{{ post.content }}</p>

{% endcache %}
The caching is done by the Phalcon\Cache component via the view component. Learn more about how this integration works in the section “Caching View Fragments”.
Inject Services into a Template
If a service container (DI) is available for Volt, you can use the services by only accessing the name of the service in the template:
{# Inject the 'flash' service #}
<div id="messages">{{ flash.output() }}</div>

{# Inject the 'security' service #}
<input type="hidden" name="token" value="{{ security.getToken() }}">
スタンドアロン コンポーネント
Using Volt in a stand-alone mode can be demonstrated below:
<?php

use Phalcon\Mvc\View\Engine\Volt\Compiler as VoltCompiler;

// Create a compiler
$compiler = new VoltCompiler();

// Optionally add some options
$compiler->setOptions(
    [
        // ...
    ]
);

// Compile a template string returning PHP code
echo $compiler->compileString(
    "{{ 'hello' }}"
);

// Compile a template in a file specifying the destination file
$compiler->compileFile(
    "layouts/main.volt",
    "cache/layouts/main.volt.php"
);

// Compile a template in a file based on the options passed to the compiler
$compiler->compile(
    "layouts/main.volt"
);

// Require the compiled templated (optional)
require $compiler->getCompiledTemplatePath();
外部情報
- A bundle for Sublime/Textmate is available here
- Album-O-Rama is a sample application using Volt as template engine, [Album-O-Rama on Github]
- Our website is running using Volt as template engine, [Our website on Github]
- Phosphorum, the Phalcon’s forum, also uses Volt, [Phosphorum on Github]
- Vökuró, is another sample application that use Volt, [Vökuró on Github]