目次
前のトピックへ
次のトピックへ
このページ
Tutorial 3: Securing INVO
In this chapter, we continue explaining how INVO is structured, we’ll talk about the implementation of authentication, authorization using events and plugins and an access control list (ACL) managed by Phalcon.
アプリケーションへのログイン
ログイン機能によって、バックエンドのコントローラーに取り組むことができるようになります。バックエンドとフロントエンドのコントローラーの分割は、論理上のものです。全てのコントローラーは、同じディレクトリ (app/controllers/) に含まれています。
システムに入るために、ユーザーは有効なユーザー名とパスワードを持っている必要があります。ユーザーは “invo” データベースの “users” テーブルに保存されます。
セッションを開始する前に、アプリケーションがデータベースに接続できるよう設定する必要があります。接続情報を持った “db” という名前のサービスが、サービスコンテナ内で用意されます。オートローダーと同様、サービスを設定するための情報は設定ファイルから取得します:
<?php

use Phalcon\Db\Adapter\Pdo\Mysql as DbAdapter;

// ...

// 設定ファイルに定義されたパラメーターに基いてデータベース接続が作成される
$di->set(
    "db",
    function () use ($config) {
        return new DbAdapter(
            [
                "host"     => $config->database->host,
                "username" => $config->database->username,
                "password" => $config->database->password,
                "dbname"   => $config->database->name,
            ]
        );
    }
);
ここで、MySQL接続アダプタのインスタンスを返しています。ロガーやプロファイラの追加、アダプタの変更等が必要であれば、それらの処理を追加することもできます。
以下の簡単なフォーム (app/views/session/index.volt) では、ユーザーにログイン情報を求めています。サンプルを簡潔にするため、いくつかのHTMLコードは省いています:
{{ form("session/start") }}
    <fieldset>
        <div>
            <label for="email">
                Username/Email
            </label>

            <div>
                {{ text_field("email") }}
            </div>
        </div>

        <div>
            <label for="password">
                Password
            </label>

            <div>
                {{ password_field("password") }}
            </div>
        </div>


        <div>
            {{ submit_button("Login") }}
        </div>
    </fieldset>
{{ endForm() }}
Instead of using raw PHP as the previous tutorial, we started to use Volt. This is a built-in template engine inspired in Jinja providing a simpler and friendly syntax to create templates. It will not take too long before you become familiar with Volt.
SessionController::startAction (app/controllers/SessionController.php) が、フォームに入力されたデータのバリデーションを行います。これには、データベース内の有効なユーザーかの確認も含まれます:
<?php

class SessionController extends ControllerBase
{
    // ...

    private function _registerSession($user)
    {
        $this->session->set(
            "auth",
            [
                "id"   => $user->id,
                "name" => $user->name,
            ]
        );
    }

    /**
     * This action authenticate and logs a user into the application
     */
    public function startAction()
    {
        if ($this->request->isPost()) {
            // POSTで送信された変数を受け取る
            $email    = $this->request->getPost("email");
            $password = $this->request->getPost("password");

            // データベースからユーザーを検索
            $user = Users::findFirst(
                [
                    "(email = :email: OR username = :email:) AND password = :password: AND active = 'Y'",
                    "bind" => [
                        "email"    => $email,
                        "password" => sha1($password),
                    ]
                ]
            );

            if ($user !== false) {
                $this->_registerSession($user);

                $this->flash->success(
                    "Welcome " . $user->name
                );

                // ユーザーが有効なら、'invoices' コントローラーに転送する
                return $this->dispatcher->forward(
                    [
                        "controller" => "invoices",
                        "action"     => "index",
                    ]
                );
            }

            $this->flash->error(
                "Wrong email/password"
            );
        }

        // ログインフォームへ再度転送
        return $this->dispatcher->forward(
            [
                "controller" => "session",
                "action"     => "index",
            ]
        );
    }
}
簡単にするため、 データベースに保存するパスワードハッシュに “sha1” を使用していますが、このアルゴリズムは実際のアプリケーションでは推奨されません。代わりに、 “bcrypt” を使ってください。
コントローラー内で $this->flash、$this->request、$this->session のようなpublic属性へのアクセスに注目してください。これらは、サービスコンテナであらかじめ定義したサービスです。初めてアクセスされたとき、コントローラーの一部として注入が行われます。
これらのサービスは共有されているため、これらのオブジェクトをどこから呼び出しても、常に同じインスタンスにアクセスすることになります。
例えば、ここで “session” サービスを呼び出して、ユーザーを識別する情報を “auth” という変数に保存しています:
<?php

$this->session->set(
    "auth",
    [
        "id"   => $user->id,
        "name" => $user->name,
    ]
);
Another important aspect of this section is how the user is validated as a valid one, first we validate whether the request has been made using method POST:
<?php

if ($this->request->isPost()) {
Then, we receive the parameters from the form:
<?php

$email    = $this->request->getPost("email");
$password = $this->request->getPost("password");
Now, we have to check if there is one user with the same username or email and password:
<?php

$user = Users::findFirst(
    [
        "(email = :email: OR username = :email:) AND password = :password: AND active = 'Y'",
        "bind" => [
            "email"    => $email,
            "password" => sha1($password),
        ]
    ]
);
Note, the use of ‘bound parameters’, placeholders :email: and :password: are placed where values should be, then the values are ‘bound’ using the parameter ‘bind’. This safely replaces the values for those columns without having the risk of a SQL injection.
If the user is valid we register it in session and forwards him/her to the dashboard:
<?php

if ($user !== false) {
    $this->_registerSession($user);

    $this->flash->success(
        "Welcome " . $user->name
    );

    return $this->dispatcher->forward(
        [
            "controller" => "invoices",
            "action"     => "index",
        ]
    );
}
If the user does not exist we forward the user back again to action where the form is displayed:
<?php

return $this->dispatcher->forward(
    [
        "controller" => "session",
        "action"     => "index",
    ]
);
バックエンドのセキュリティ保護
バックエンドは登録されたユーザーだけがアクセスできるプライベートな領域です。したがって、登録されたユーザーだけがそれらのコントローラーにアクセスできるようチェックする必要があります。たとえば、ログインせずに products コントローラー (プライベート領域) にアクセスしようとすると、以下のように表示されるはずです:
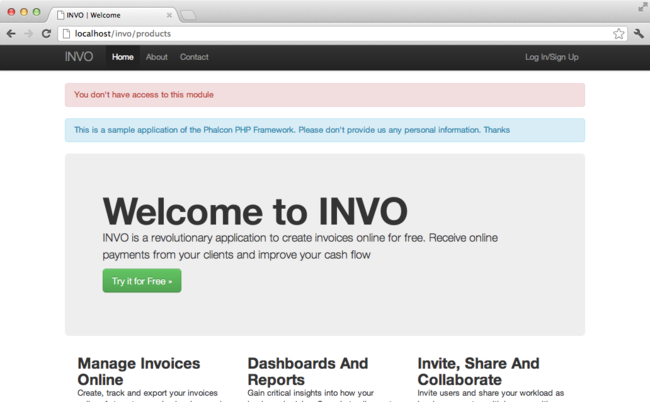
コントローラー・アクションにアクセスしようとしたときにはいつでも、アプリケーションは現在のロール (セッションに含まれる) が、アクセス権を持っているか確認します。アクセス権がない場合は、上のようなメッセージを表示し、インデックスページに遷移させます。
次に、アプリケーションがこの動きをどのように実現しているか見ていきましょう。最初に知るべきは、Dispatcher コンポーネントです。これは、 Routing コンポーネントによって発見されたルートの情報を受け取ります。次に、適切なコントローラーを読み込んで、対応するアクションのメソッドを実行します。
通常、フレームワークはディスパッチャを自動的に作成します。今回は、要求されたアクションを実行する前に、認証を行い、ユーザーがアクセスできるか否かチェックする必要があります。これを実現するため、ブートストラップの中に関数を用意して、ディスパッチャを置き換えています:
<?php

use Phalcon\Mvc\Dispatcher;

// ...

/**
 * MVC dispatcher
 */
$di->set(
    "dispatcher",
    function () {
        // ...

        $dispatcher = new Dispatcher();

        return $dispatcher;
    }
);
これで、アプリケーションで使用されるディスパッチャを完全に制御できるようになりました。フレーワークの多くのコンポーネントはイベントを発火するので、内部の処理の流れを変更することができます。DIコンポーネントが接着剤として機能し、 EventsManager がコンポーネントが生み出すイベントをインターセプトし、イベントをリスナーに通知します。
イベント管理
EventsManager によって、特定のタイプのイベントにリスナーを割り当てることができます。今、私達が取り組んでいるイベントのタイプは “dispatch” です。以下のコードは、ディスパッチャによって生成される全てのイベントをフィルタリングしています:
<?php

use Phalcon\Mvc\Dispatcher;
use Phalcon\Events\Manager as EventsManager;

$di->set(
    "dispatcher",
    function () {
        // Create an events manager
        $eventsManager = new EventsManager();

        // Securityプラグインを使用して、ディスパッチャが生成するイベントを監視する
        $eventsManager->attach(
            "dispatch:beforeExecuteRoute",
            new SecurityPlugin()
        );

        // Handle exceptions and not-found exceptions using NotFoundPlugin
        $eventsManager->attach(
            "dispatch:beforeException",
            new NotFoundPlugin()
        );

        $dispatcher = new Dispatcher();

        // イベントマネージャーをディスパッチャに束縛する
        $dispatcher->setEventsManager($eventsManager);

        return $dispatcher;
    }
);
When an event called “beforeExecuteRoute” is triggered the following plugin will be notified:
<?php

/**
 * Check if the user is allowed to access certain action using the SecurityPlugin
 */
$eventsManager->attach(
    "dispatch:beforeExecuteRoute",
    new SecurityPlugin()
);
When a “beforeException” is triggered then other plugin is notified:
<?php

/**
 * Handle exceptions and not-found exceptions using NotFoundPlugin
 */
$eventsManager->attach(
    "dispatch:beforeException",
    new NotFoundPlugin()
);
Securityプラグインは (app/plugins/SecurityPlugin.php) にあるクラスです。このクラスは “beforeExecuteRoute” メソッドを実装しています。これは、ディスパッチャーが生成するイベントの1つと同じ名前です:
<?php

use Phalcon\Events\Event;
use Phalcon\Mvc\User\Plugin;
use Phalcon\Mvc\Dispatcher;

class SecurityPlugin extends Plugin
{
    // ...

    public function beforeExecuteRoute(Event $event, Dispatcher $dispatcher)
    {
        // ...
    }
}
フックイベントは常に2つの引数を取ります。第1引数はイベントが生成されたコンテキストの情報($event) で、第2引数はイベントを生成したオブジェクト自身 ($dispatcher) です。プラグインが Phalcon\Mvc\User\Plugin を継承することは必須ではありませんが、継承することでアプリケーションのサービスに簡単にアクセスできるようになります。
ACLリストを使用してユーザーがアクセス権を持つかチェックすることで、現在のセッションのロールを検証するようになりました。ユーザーがアクセス権を持たない場合、前述したように最初のページにリダイレクトされます:
<?php

use Phalcon\Acl;
use Phalcon\Events\Event;
use Phalcon\Mvc\User\Plugin;
use Phalcon\Mvc\Dispatcher;

class SecurityPlugin extends Plugin
{
    // ...

    public function beforeExecuteRoute(Event $event, Dispatcher $dispatcher)
    {
        // ロールを定義するため、セッションに "auth" 変数があるかチェックする
        $auth = $this->session->get("auth");

        if (!$auth) {
            $role = "Guests";
        } else {
            $role = "Users";
        }

        // ディスパッチャからアクティブなコントローラー名とアクション名を取得する
        $controller = $dispatcher->getControllerName();
        $action     = $dispatcher->getActionName();

        // ACLリストを取得
        $acl = $this->getAcl();

        // ロールがコントローラー (又はリソース) にアクセス可能かチェックする
        $allowed = $acl->isAllowed($role, $controller, $action);

        if (!$allowed) {
            // アクセス権が無い場合、indexコントローラーに転送する
            $this->flash->error(
                "You don't have access to this module"
            );

            $dispatcher->forward(
                [
                    "controller" => "index",
                    "action"     => "index",
                ]
            );

            // "false" を返し、ディスパッチャーに現在の処理を停止させる
            return false;
        }
    }
}
ACLリストの提供
上の例では、 $this->getAcl() メソッドでACLを取得しました。このメソッドもプラグインに実装されています。ここでは、アクセス制御リスト (ACL) をどのように作ったか、ステップバイステップで解説します:
<?php

use Phalcon\Acl;
use Phalcon\Acl\Role;
use Phalcon\Acl\Adapter\Memory as AclList;

// ACLオブジェクトを作る
$acl = new AclList();

// デフォルトの挙動はDENY(拒否)
$acl->setDefaultAction(
    Acl::DENY
);

// 2つのロールを登録する
// ユーザーは登録済みユーザー、ゲストは未登録ユーザー
$roles = [
    "users"  => new Role("Users"),
    "guests" => new Role("Guests"),
];

foreach ($roles as $role) {
    $acl->addRole($role);
}
次に、それぞれのエリアのリソースを個別に定義していきます。コントローラー名がリソースで、これらのアクションがリソースへのアクセス権です:
<?php

use Phalcon\Acl\Resource;

// ...

// プライベートエリアのリソース (バックエンド)
$privateResources = [
    "companies"    => ["index", "search", "new", "edit", "save", "create", "delete"],
    "products"     => ["index", "search", "new", "edit", "save", "create", "delete"],
    "producttypes" => ["index", "search", "new", "edit", "save", "create", "delete"],
    "invoices"     => ["index", "profile"],
];

foreach ($privateResources as $resourceName => $actions) {
    $acl->addResource(
        new Resource($resourceName),
        $actions
    );
}


// 公開エリアのリソース (フロントエンド)
$publicResources = [
    "index"    => ["index"],
    "about"    => ["index"],
    "register" => ["index"],
    "errors"   => ["show404", "show500"],
    "session"  => ["index", "register", "start", "end"],
    "contact"  => ["index", "send"],
];

foreach ($publicResources as $resourceName => $actions) {
    $acl->addResource(
        new Resource($resourceName),
        $actions
    );
}
いま、ACLは既存のコントローラーと関連するアクションの情報を知っている状態になっています。”Users” ロールはバックエンドとフロントエンド双方の全てのリソースにアクセスできます。”Guests” ロールは公開エリアにだけアクセスできます:
<?php

// 公開エリアのアクセス権をユーザーとゲストの双方に与える
foreach ($roles as $role) {
    foreach ($publicResources as $resource => $actions) {
        $acl->allow(
            $role->getName(),
            $resource,
            "*"
        );
    }
}

// ユーザーにだけ、プライベートエリアへのアクセス権を与える
foreach ($privateResources as $resource => $actions) {
    foreach ($actions as $action) {
        $acl->allow(
            "Users",
            $resource,
            $action
        );
    }
}
万歳! これで、ACLは終わりです。 In next chapter, we will see how a CRUD is implemented in Phalcon and how you can customize it.